Migrate Content Management Systems
Content Management Systems (CMS) migration involves the process of moving your website or web application from one CMS platform to another.
This process is usually undertaken to leverage the benefits of a more advanced, user-friendly, and efficient CMS. The following steps can be taken to migrate content management systems.
Migration Planning
Identify the reasons for migration, understand the scope of the migration, and establish clear goals and objectives. Decide on the new CMS platform that you want to migrate to.
Backup Your Current Website
Before starting the migration process, it’s crucial to backup your current website. This step is necessary so that if something goes wrong during the migration, you can restore your website to its previous state.
Choose a Migration Method
Depending on the CMS platforms involved, you may be able to use a tool or plugin to assist with the migration. If not, you might need to do it manually or hire a professional.
Content Migration
This step involves moving all the website content from the old CMS to the new one. This includes text, images, videos, and any other data related to your website.
Website Design and Structure
After migrating the content, you’ll need to set up the design and structure of your new site. This could mean choosing a new theme, setting up menus, and organising your content.
Post Migration Testing
Once everything has been migrated over, it’s important to thoroughly test your new site to ensure everything works as expected. This includes checking links, forms, and multimedia, and making sure all content displays correctly.
SEO Considerations
Migrating to a new CMS could impact your SEO. Make sure you take steps to preserve your rankings, such as setting up redirects from old URLs to new ones.
Migrating to a new Content Management System (CMS) has the potential to significantly impact your Search Engine Optimisation (SEO), thereby affecting your website’s visibility and ranking on search engine result pages. This change can disrupt your carefully cultivated SEO if not handled properly.
Therefore, it is crucial to take precautionary steps to preserve your SEO rankings during the migration process. One such step is setting up redirects from your old URLs to the new ones, ensuring that the traffic and link equity previously associated with the old URLs are not lost but transferred to the new ones. This process helps to maintain your site’s ranking and visibility during the transition.
Launch New Website
After testing and making any necessary adjustments, you’re ready to go live with your new website.
Website Announcement: Celebrate your new website by throwing a virtual launch party. Use social media, email newsletters, and other digital platforms to share the news and invite people to view your new website.
Email Marketing: Send out an email blast to your existing customers and subscribers, announcing the launch of the new website and highlighting its new features.
Social Media Promotion: Share the launch on all your social media platforms and consider investing in social media advertising to reach a larger audience.
Feedback Collection: Implement a feedback system on your website for the initial few weeks to understand what visitors like or dislike about your site.
Website Analytics: Set up website analytics to track visitor behavior, page views, bounce rate, etc., which will help you make necessary changes in the future.
Customer Support: Make sure there’s a system in place for customer support, whether it’s a live chat feature or a quick way to email for help.
User Experience Testing: Even after going live, continue to conduct user experience testing to make necessary improvements.
Post-Migration Support
After the new site goes live, you’ll need to monitor it closely to catch and fix any issues that might arise. This might include broken links, lost content, or SEO issues.
- Providing immediate technical assistance for any system issues
- Offering ongoing training and education to users about the new system
- Conducting regular check-ins to ensure system is operating smoothly
- Addressing any data integrity issues that arise after migration
- Assisting with any necessary software updates or improvements
- Offering troubleshooting support for any problems encountered
- Ensuring users can effectively use new features and understand changes
- Monitoring system performance and making adjustments as needed
- Providing documentation and resources for reference
- Conducting data audits to ensure accuracy and completeness
- Facilitating communication between users and the IT team
- Ensuring security measures are properly implemented and maintained
- Providing support for integration with other systems or software
- Offering feedback and recommendations for future system enhancements
- Handling any issues related to system compatibility or interoperability
Migrating your content management system is a complex process that requires careful planning and execution, but it can bring significant benefits in terms of improved functionality, user experience, and overall website performance.
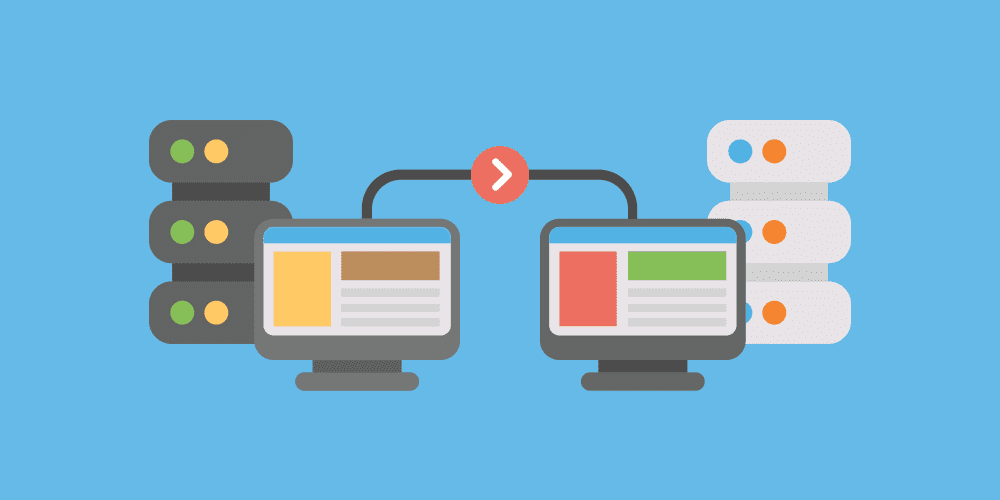
Migrate Website Hosting Providers
Migrating website hosting providers involves several steps:
Research New Hosting Provider
Start by researching various web hosting providers to find one that best suits your needs. Consider factors like uptime, speed, price, security, customer support, and scalability.
Backup Your Website Data
Before starting the migration process, it’s important to back up your website data. This includes all files, databases, emails, and settings.
Set Up the New Hosting Account
After you’ve chosen a new hosting provider, you’ll need to set up your new hosting account. This typically involves choosing a hosting plan, creating an account, and sometimes installing a content management system (CMS) if necessary.
Transfer Files and Databases
Next, transfer all of your website files and databases to the new hosting provider. This can often be done through FTP or a control panel like cPanel.
Test Website on New Hosting Provider
Before making the switch permanent, it’s crucial to test your website on the new host. This can typically be done by modifying your hosts file to preview your site.
Update Website DNS Records
Once you’re satisfied that your website is functioning correctly on the new host, you’ll need to update your DNS records. This will point your domain name to the new host’s servers.
Monitor Your Website
After the DNS changes have propagated, continue to monitor your website to ensure it’s operating as expected. Keep a close eye on things like site speed, uptime, and functionality.
Cancel Your Previous Hosting Account
Once you’re sure everything is working correctly on the new host, you can cancel your old hosting account.
Set Up New Email Accounts
If you had email accounts with your old hosting provider, you’ll need to set these up with your new host. You will need to migrate your emails from the old provider to the new one and redirect your old emails to the new provider.
Continue Regular Site Maintenance
After the migration is complete, continue with regular site maintenance and backups to ensure your website remains secure and up to date.
Remember, website migration can result in downtime if not done properly, so it’s often recommended to carry out this process during off-peak hours. Furthermore, it might be beneficial to hire a professional if you’re not comfortable with the process.